Replace Windshield Wiper Assembly

California had been in a drought for quite some time, so it took me a while to realize my windshield wipers were not functioning. When I actually wanted to clean my windows, I realized something was very wrong. Upon inspection, I found the cast metal end of the wiper linkage had sheared off, rendering the whole assembly useless.

I looked into ideas to fix it, but I found someone selling a used linkage assembly on mye28.com. I had to remove the blower motor and found it to be a mess in there, so I cleaned it, the wiper motor, and the heater closing panel on the firewall before putting it all back together. In addition to the linkage, I also replaced some rotting rubber dampening rings, which acted as a grommet for the wiper stud going through the body.

It was nice to have functioning and non-clunking windshield wipers. And, hey, what’s up with the fraying throttle cable? Is that dangerous?

Perform First Oil Change

I knew the oil had just been changed when I bought the car. At right under 3,000 miles of ownership, I decided to change the oil. It wasn’t a magical interval for me, but it just felt like it was time. I didn’t want to get too caught up in the great oil debate, so I took some direction from the forums and went with regular (i.e., non-synthetic) Castrol GTX 20W-50.

I’ve since started to use LiquiMoly in my Audi RS4, so we’ll see if I change my mind about the M5.

Replace Door Latch Buffers

Nothing drives me crazier than little squeaks and rattles while driving a car. I’ve had to chase them down in almost every car I’ve owned at one time or another. The M5 was not immune, though some research guided me to the rubber buffers on the door latches and guides. I bought new sets of each from Bavarian AutoSport and replaced them. Those were very effective in eliminating the squeaking.

Replace Fuel Hose to Fix Leak

There was a very strong smell of gasoline inside the cabin. It didn’t seem normal so when I got home, I took a look under the car and saw fuel spewing onto the ground. That seemed just a little bit dangerous.

I bought some BMW fuel hose and clamps from the local dealership and sourced and new fuel filter from FCP, which I didn’t end up replacing until later.

Replace Rear Differential Mount

From day 1, the M5 had a strange vibration in the driveline. I tried to diagnose it and had several possible root causes. There was some also possibly unrelated clunking coming from the rear. Before I knew what the subframe bushings entailed, the rear differential mount was discussed a lot. By its positioning and function, it seemed to be a likely candidate for replacement.

Rarely is the consensus on the internet, but one thing that was suggested often was to use the part from the Euro M535i (33171129786), which was more robust and less expensive than the OEM M5 part. I sourced a Lemforder part from FCP Euro. It was a pretty easy procedure, but unfortunately did not eliminate the clunking.

Around this time, my speedometer was intermittent. I found that the speedometer cable was rubbing on the differential output and shorting out. I taped it up and the problem was fixed. I was thankful it wasn’t anything more serious.

Repair and Restore Leather Sport Seats

One common failure I’ve seen on a lot of E28 M5s and E28s with sport seats is that the driver’s side bolster sags. This is usually caused when the bottom side bolster seat frame becomes separate from the base at the front of the seat. This car had the same problem when it was delivered (first photo), so when the seats were out after I detailed the interior, I took the driver’s seat to a local upholstery shop for repair. The shop welded the seat frame and also re-stuffed the seats. I wanted to address the broken piping, but it wasn’t clear that they could make it exactly original and it also sounded very involved to undo it.

Each seat had missing or broken parts on the inside hinge covers, so I ordered parts to replace the sliders and screws.

After I got the driver’s seat back, I went about addressing the faded leather. I used a product called Doc Bailey’s Leather Black, which is a conditioner with a black dye in it. It worked really well to bring back the color, shine and luster to the seats. I was very pleased with the results and was happy to put everything finally back into the car.

Detail Interior and Install Stereo

One of my hobbies in my younger years was car audio. In most of my older cars, I’ve typically installed head units with Aux-In capabilities to play or stream music from an iPod or iPhone. My go-to head unit is a Harmon Kardon Traffic Pro. The navigation is useless now that we have Waze and Google Maps, but I like the DIN size, simple look and matching BMW red lighting. I also usually use a/d/s amplifiers and speakers, which are not necessarily period-correct, even if the brand definitely is.

Over the course of months I assembled pieces of the system until it was time to finally install everything. This required removing a lot of the interior, except ironically the dashboard, which had already been through enough. Once all the seats were removed, it uncovered a secondary project, which was to detail the interior carpets. They had accumulated over a quarter-century of mostly coffee stains (pre-cupholder era), chocolate(?), and dog hair. Although the loose change found was not enough to compensate me for my effort, the payoff was a much cleaner car.

I couldn’t get out every stain with the steam cleaner I had. I’ve since acquired a new steamer that might be able to get even more, but perhaps it should be left to a professional with the right chemicals to get everything out (if possible). I also took the opportunity to clean up the front seat bases. Finally, people often comment that the rear deck is somehow blue, but really it’s just sun-faded after all these years. I used some SEM spray paint to bring it back to its Anthracite glory.

Repair Front Passenger Window Regulator

I knew the front passenger window wasn’t working before the car even arrived, so I very early on sourced a replacement window regulator from eBay. After it arrived, I realized that the main failure were the contacts on the window switch, which once cleaned up, demonstrated that the regulator was indeed working.

What wasn’t working well was the fact that the window went up and down very slowly compared to the driver’s side window. During the interior project, I removed the door card and the vapor barrier to remove the window regulator. I degreased all of the old, dried grease in the tracks and lubed it up again using white lithium grease. It goes up and down beautifully now.

Replace Antenna Mast

I had mentioned that my bent antenna was a possible suspect to my battery issue, which really turned out to be my alternator. In any case, the antenna was annoying, so I started looking for a replacement. The motor was fine and I found that the whole unit was pretty expensive, but the mast itself wasn’t too bad. I had sourced one on eBay months ago and then finally got around to installing it, which was actually pretty fun.

Replace Cracked Dashboard

One of the most common issues with old E28s are cracked dashboards. This is usually caused by years of exposure to heat and sun. This M5 was not spared and it was one of the worst issues in the interior known to me when I purchased the car. After owning it for a while, I had gotten in the habit of watching the parts classifieds on www.mye28.com and also searching my local Craigslist.

In January of 2015, my persistence paid off, as a nice crack-free E28 dashboard was found about an hour away. I had cautious optimism, as I had already driven across a bridge once to look at a claimed “crack free” dashboard, only to find that it was covered in small cracks. The seller was apologetic and I learned this is just part of the process. The dashboard I found was not perfect – it had one small tear near the front, which wasn’t visible at all while sitting in the car.

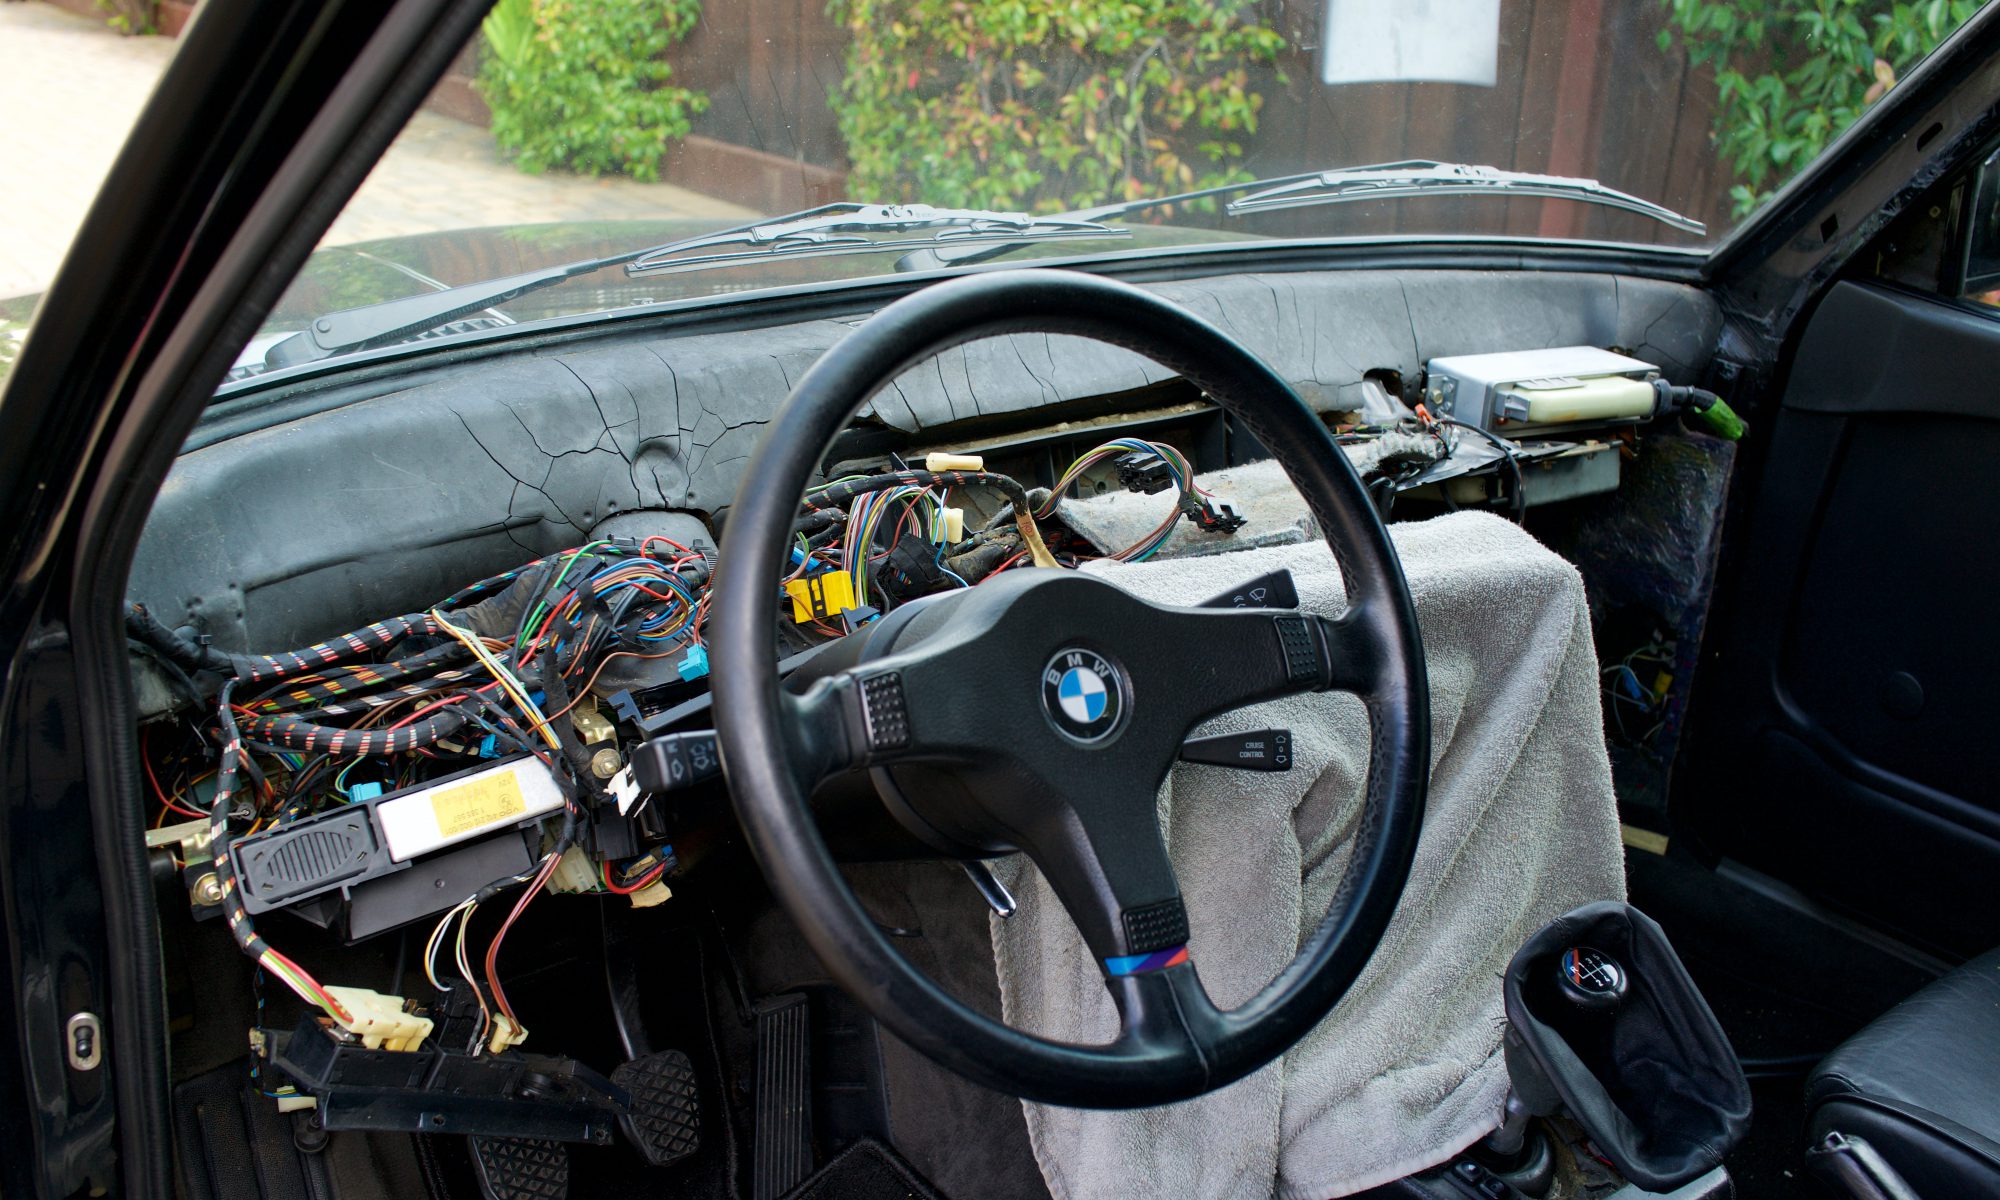
I went through the process of removing the vents and ducts from the old dash, running them through the dishwasher, and transferring them to the replacement. This also included the VIN tag, which required drilling out the rivets. The VIN tag didn’t want to just pop off, so I used a little “gentle” force to drive them out with a hammer. Much to my horror, I had actually introduced a little crack in a thin part of the dashboard! This is just one of the many tough lessons I learned about scarce and NLA parts. Again, just part of the process.

After my horror subsided, I decided that the dashboard, while not perfect, was still a million times better than the terribly cracked original and the rest of the car was not perfect either, so it was pretty on par. I went ahead with what most online posts would describe as a big pain-in-the-ass procedure, especially with the windshield remaining installed.

I’m pretty good at following instructions and there are some good ones out there. Like many of the procedures I’ve followed, this one was found on this site. In the end, it wasn’t too bad and the new almost-crack-free dash improved the interior 1,000%. This was a big win for me.